
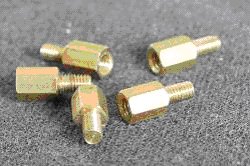
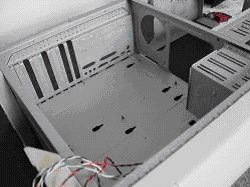
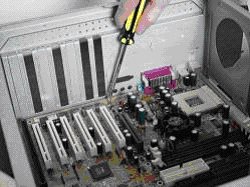
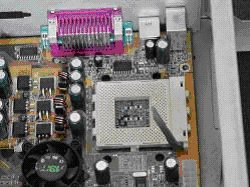
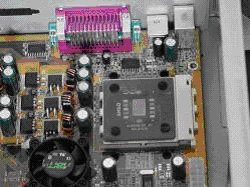
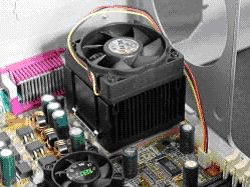
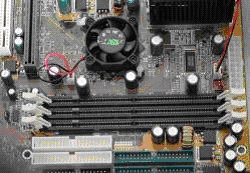
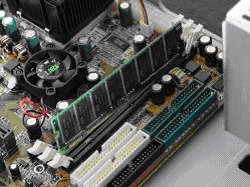
How To Install A Motherboard, Processor, And Memory STEP 1 Preparation The first thing you need is a clean, level place to work. You will also need a Phillips head screw driver, needle nose pliers, and about six screws and washers. You will also need your user's manual. Static electricity can be a big problem, so always ground your self by touching the metal of the case before handling any of the equipment. Be prepared: read your user's manual, and familiarize yourself with the motherboard and its layout. This is the bay of your ATX case, the big open area into which most of the components will be installed STEP 2 With a new case, a set of tiny screws or brackets are usually included. These are to keep the motherboard from coming into contact with the case and prevent any short that might occur. STEP 3 Case Prep Remove all panels, slots, and additional openings on your case (such as your USB, sound, and COM ports). Be careful, some cases have sharp edges and can cut you. Use your needle nose pliers to remove the metal pieces. Mark the case on the inside where you will install the mounting riser pins. This can be done with a marker by placing the board in the case and marking where the mounting riser pins will go through the screw holes on the board. I used red stickers so you can better see what I mean. Install the mounting riser pins in your pre-marked holes. You install them by turning them to the right. Make sure you screw them in completely, that way the board will sit flat. Insert them into the corner and side screw holes that you will use to attach the motherboard STEP 4 Install and Connect the Board The next step is placing the motherboard in the case and securing it with the screws and washers that came with your case. Make sure to ground yourself out before this step. Like with the mounting riser pins, they screw in to the right. Lining your board up in the case will make your job a little easier. Place the board in the case and then screw it in. Use washers with the screws that you use. Then screw the motherboard into place. To avoid static touch the case to ground yourself or use an antistatic band. STEP 5 Installing Processor The next t step is mounting your CPU . Check your user's manual and see if any jumpers need to be set on your motherboard, such as the front side bus, the clock speed, and the core voltage. The CPU has a corner cut out that matches the socket on the Socket 370 type. Most motherboards are jumperless these days, but check your manual to see if you have jumpers to be set. If you do, set them at this time. Use your needle nose pliers for this task. Most current CPUs come in a socket form. You usually will have to lift a lever on the motherboard's socket to install it. (Some motherboards require a manual jumper setup for the processor but most pick it up automatically). STEP 6 The CPU's pins are configured in such a way that it can only be installed one way. Do not force it into the socket! Make sure that you have it turned the correct way, and then close the lever. STEP 7 Clip the CPU cooler onto the processor socket and attach its power cable to the motherboard's fan header. STEP 8 These three long thin slots (called DIMMs) are for you memory modules. Different motherboards have different numbers and types of DIMM slots. These are for SDRAM STEP 9 Like the CPU, there is only one proper way of installing the memory modules. Align them with the slot but do not force them in STEP 10 When a memory module is properly installed, the clips on the slot's sides will close into the its notches. |


Back To General Information |
